

Travel Guides
Hidden in the heart of Kansas, Lindsborg offers a delightful taste of Swedish culture and charm that will leave you wanting to discover more.
Hi, what are you looking for?


Creatures to Beware of When Adventuring in California Deserts
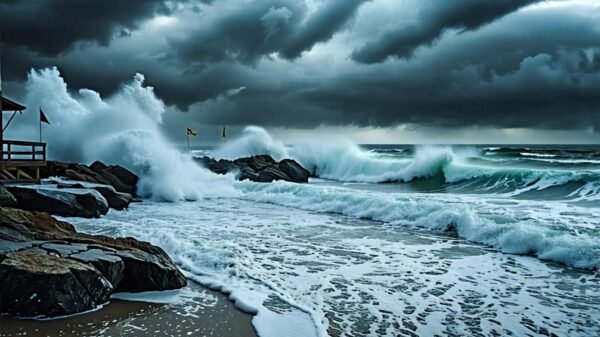
Why You Should Avoid Swimming in the Atlantic Ocean During This Time of Year

The World's Most Dangerous Mountains to Climb: A Thrilling Challenge
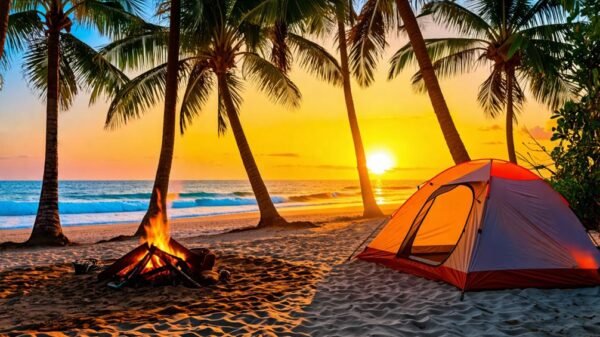
Camping by the Beach: California’s Sunset Beach State Park Offers Unmatched Views

Unraveling the Mystery: Why is the Sky Yellow and What Does It Signify?

This Phone Trick Could Save You Hundreds on Your Next Cruise—Here’s How

Clever Shampoo Bottle Hack: The Ultimate Cruise Cash Stash Trick

Unlock the Secret: Use Alka-Seltzer to Lure Fish Right to Your Line!

Transform Your Tackle Gear Organization with This Genius Pool Noodle Boat Hack!

Discover Why a Yellow Bulb on Your Porch Makes the Full Moon Even More Magical!
Lindsborg: The American Town Full of European Charm You’ve Never Heard Of

Wake Island Waterpark: California’s Largest Hidden Gem for Family Fun

Escape Barcelona Crowds: Discover Valencia’s Spacious Beaches and Foodie Delights

Hiking Ryan Mountain: The Best Spot for a Sunset in Joshua Tree National Park

Northport Beach: NYC’s Hidden Gem That’s Less Crowded Than the Hamptons

Is It Safe to Visit Myanmar? Here’s What You Need to Know

Why Visiting National Parks in Summer Can Be Dangerous (And How to Stay Safe)

The Shocking Reason Dallas-Fort Worth Airport Is Ranked America’s Worst

Samantha Brown’s Warning: The Cruise Packing Mistake That Could Ruin Your Trip

How to Spot a Fake Taxi in Italy and Avoid Getting Scammed

Elevate Your Yard’s Style with This Clever Dollar Tree Lighting Hack!

Discover the Easy Newspaper Trick to Keep Pests Away from Your Garden!

Discover What’s Luring Snakes into Your Yard – 9 Surprising Factors!

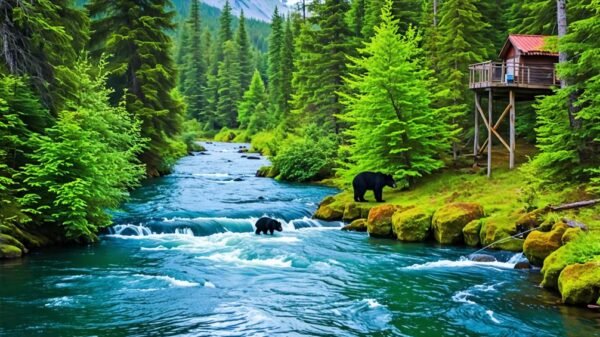
Think Twice Before Installing a Bird Feeder in Bear Country!

Unlock the Secret Weapon in Your Kitchen to Keep Skunks Out of Your Garden!

Why Cappuccino Is Only a Morning Drink in Italy (And What to Order in the Afternoon)

Why Ordering a Latte in Italy Will Get You a Glass of Milk (And What to Order Instead)
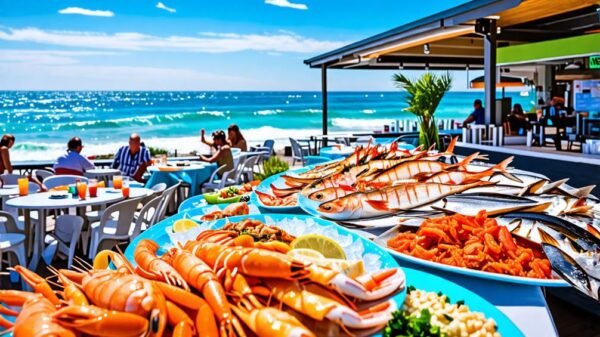
California’s Gulfstream Restaurant: The West Coast’s Best Seafood Experience

We Attempted This S’mores Dessert Hack, and It Turned Out to Be a Gooey Disappointment.

The True Explanation Behind Why Survivor Contestants No Longer Need to Boil Water
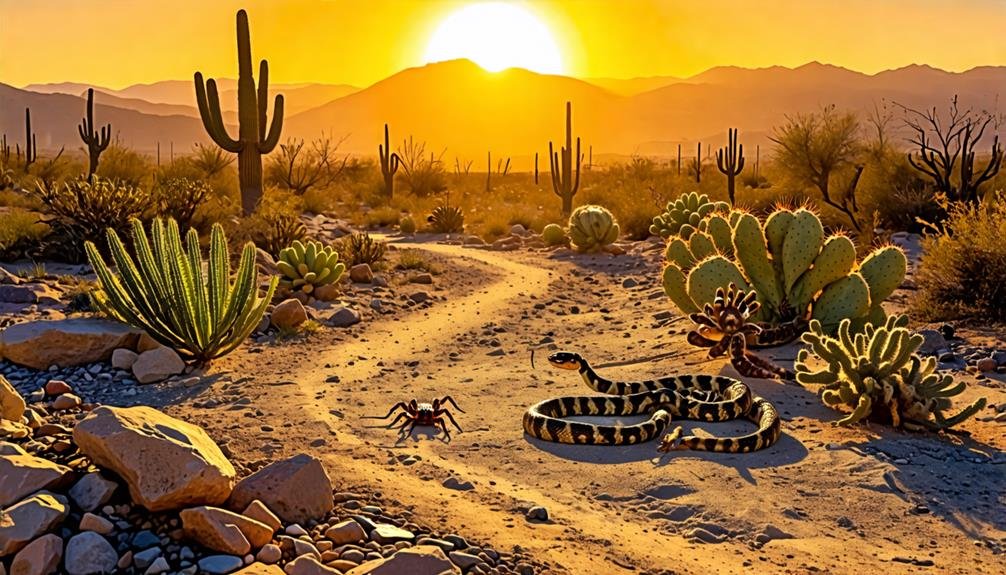

When exploring California's deserts, it's important to watch for certain creatures that can pose risks. Venomous snakes like the Mojave Green and Western Diamond-Back...

Swimming in the Atlantic Ocean during the fall can be risky due to several seasonal hazards. Hurricane season peaks from June to November, bringing...

Climbing the world's most perilous mountains, such as Mount Everest, K2, and Annapurna I, presents a thrilling challenge filled with incredible beauty and serious...
Why is cappuccino strictly a morning drink in Italy, and what delightful alternatives await you in the afternoon? Discover the secrets behind these traditions!
Before planning your trip to Myanmar, uncover the critical safety concerns that could impact your journey and what alternatives might be safer.


Hidden in the heart of Kansas, Lindsborg offers a delightful taste of Swedish culture and charm that will leave you wanting to discover more.

Adventure awaits at Wake Island Waterpark, California's largest hidden gem for family fun, where thrills and relaxation blend seamlessly—discover what makes it special!

Find tranquility in Valencia's stunning beaches and indulge in its culinary treasures, but what hidden gems await just beyond the shore?

Wondering how summer heat and wildlife can threaten your national park adventure? Discover essential safety tips to protect yourself during your visit.

Make your sunset hike unforgettable at Ryan Mountain, but do you know the essential tips to ensure a safe and memorable experience?

Journey to Northport Beach, where stunning views and rich history await—discover why this hidden gem outshines the crowded Hamptons!

Beneath the surface of Dallas-Fort Worth Airport's chaos lies a shocking truth that explains its title as America's worst—discover what truly fuels the disruptions.


Discover the hidden charm of Hawaii's most underrated town, where local flavors and Aloha spirit blend—what treasures will you uncover?

The crucial packing mistake that could derail your cruise experience is revealed—don't let delayed luggage ruin your vacation bliss!


Discover the magical charm of Hilo, Hawaii, an affordable tropical paradise where adventure and culture await—are you ready for an unforgettable experience?

Make sure you know the signs of a fake taxi in Italy to avoid scams and ensure your safety during travel—discover essential tips inside!


Follow these essential tips to respect Japan's fragrance customs and discover what alternatives can enhance your travel experience!

This simple phone trick could significantly cut your cruise costs—discover how to avoid shocking roaming fees while staying connected!

The thrill of safely spotting bears at Anan Wildlife Observatory awaits, revealing secrets of Alaska's wilderness that you won't want to miss.


Travel to Corona Del Mar, where California's hidden gem mirrors Portugal's Algarve, and discover the enchanting beaches waiting to be explored.

Curious why your latte order in Italy may leave you with just milk? Discover the right terms to savor authentic Italian coffee!